DIY Broken Foglight Repair
 07-08-2010, 10:25 PM
#1
Instructor
Thread Starter
Join Date: Nov 2006
Location: Northern Virginia
Age: 52
Posts: 172
Likes: 0
Received 4 Likes
on
2 Posts
DIY Broken Foglight Repair
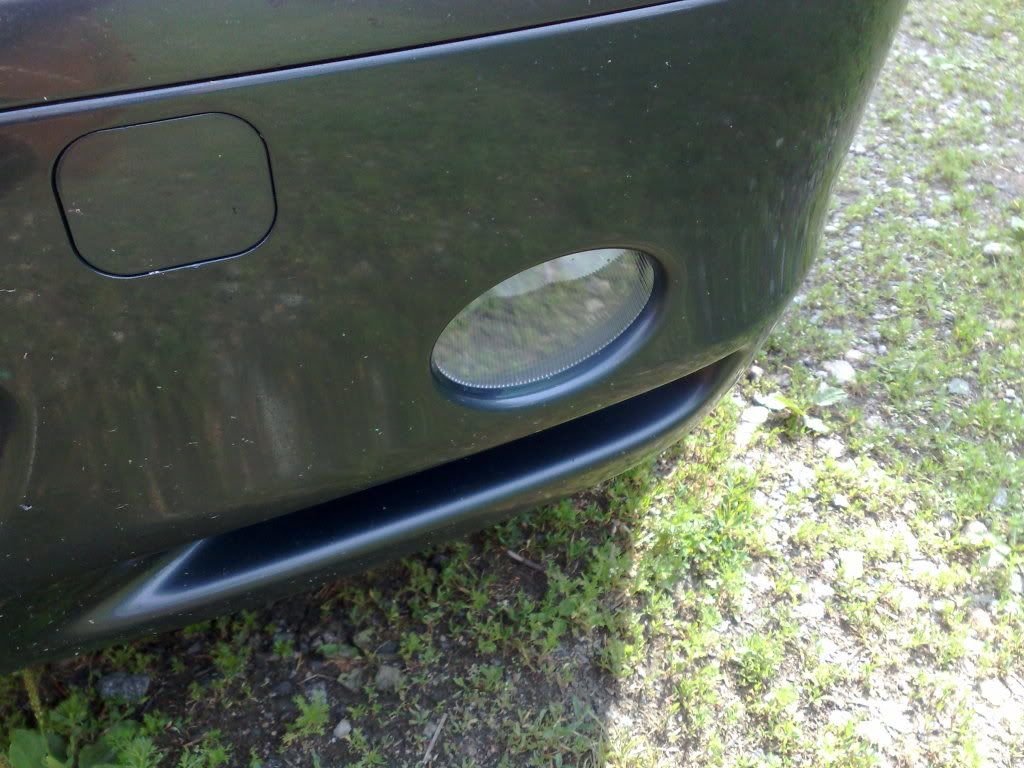
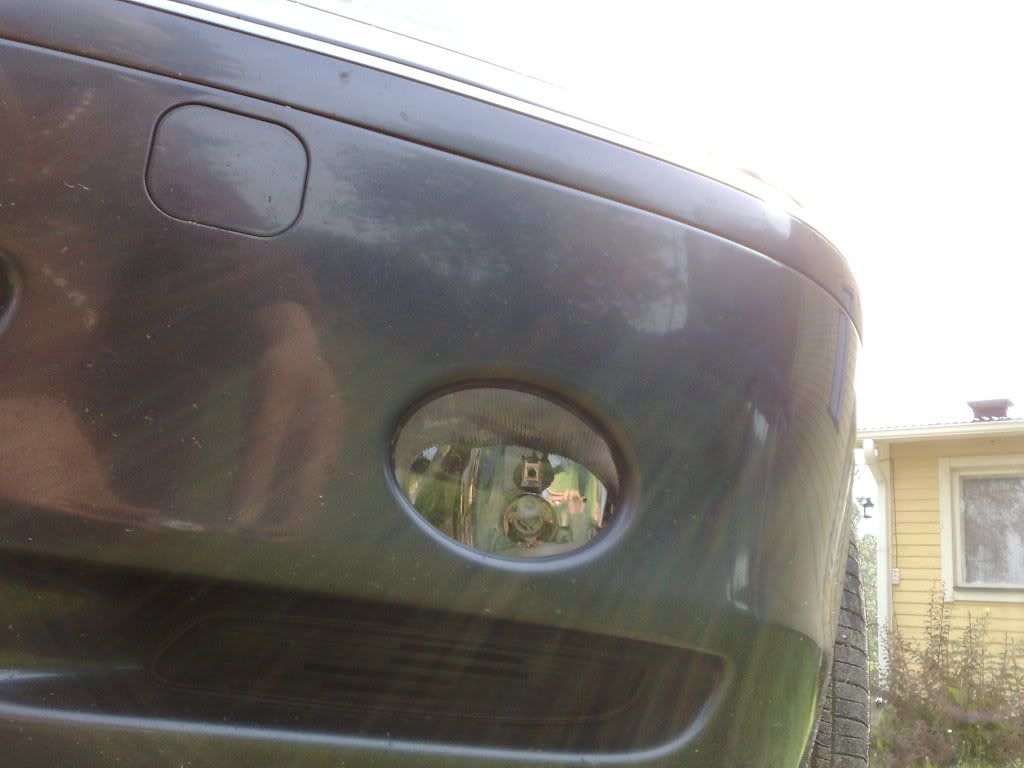
As many know, a broken foglight lens on the 2nd Generation RL is pretty common and quite expensive to repair if you take it to your local Acura dealer or body shop. I found this out when bringing my car in for a state inspection and it failed b/c of the broken foglight. When they told me it would cost $400.00, I had to take matters into my own hand b/c there's no way I'm going to pay $400.00 to repair a broken piece of glass on a foglight. Everything was working but the glass was broken from a piece of rock hitting the lens.
With the help of reading some other DIY foglight repairs on this Acura forum and from other Honda forums, here's my DIY foglight repair for under $10.00. It took about 2 hours of actually "work" time and about 12 hours of waiting for the silicon to dry.
Supplies:
1. Lexan Polycarbonate Glass (Found at Lowes for $3.80, 8x10)
2. Exterior Silicon (Found at any hardware store for $4.80)
3. Download this manual that will help you remove the front bumper so you can remove the foglight. http://techinfo.honda.com/rjanisis/pubs/AI/BII31139.pdf
Note: Lexan Polycarbonate glass is 250 times stronger than normal glass and is virtually unbreakable, plus it does not chip and can be exposed to high heat. It's used in spaceshuttle windows and for bulletproof windows. I figured if it can do all of this, it should be good enough for a foglight lens.
So here we go..........
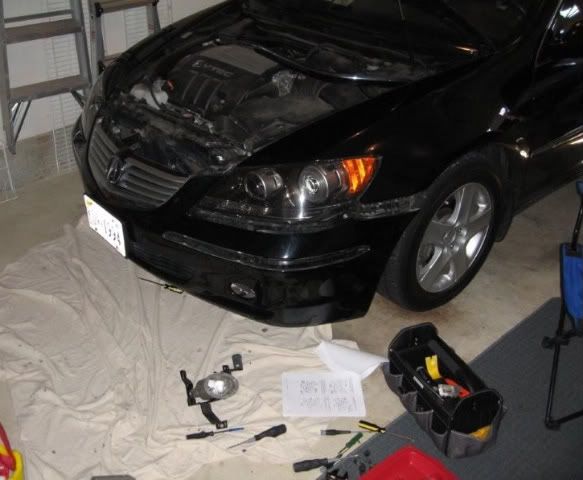
You will first need to remove the engine covers that will reveal the bumper clips so that you can get the front bumper partially off. Follow the pdf link above and it will assist you with the bumper removal. I found this especially helpful to locate the nuts and clips to get the bumper off.
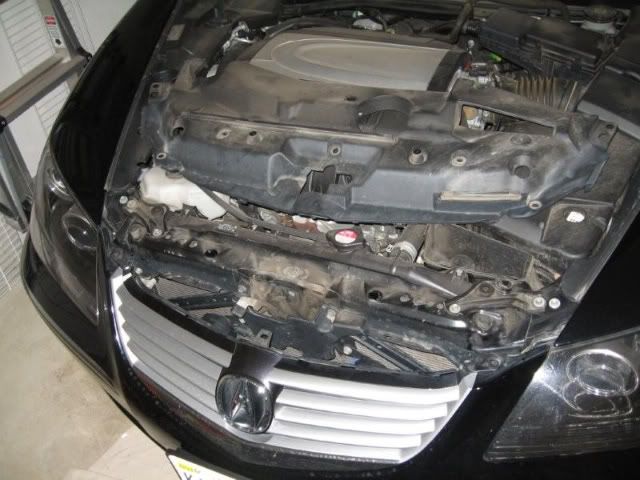
Next, once all clips and nuts are removed....you can get to the foglight housing off that is located behind the bumper.
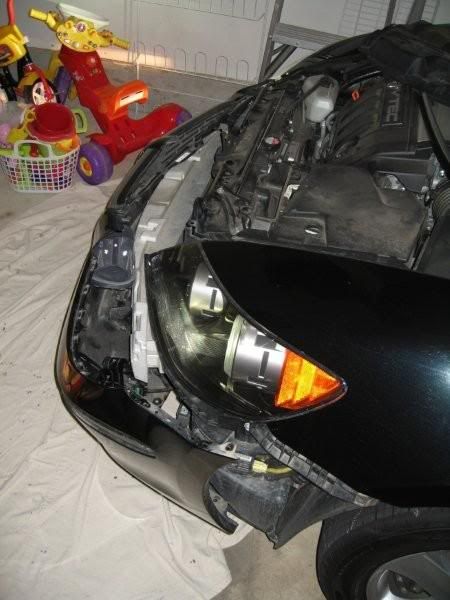
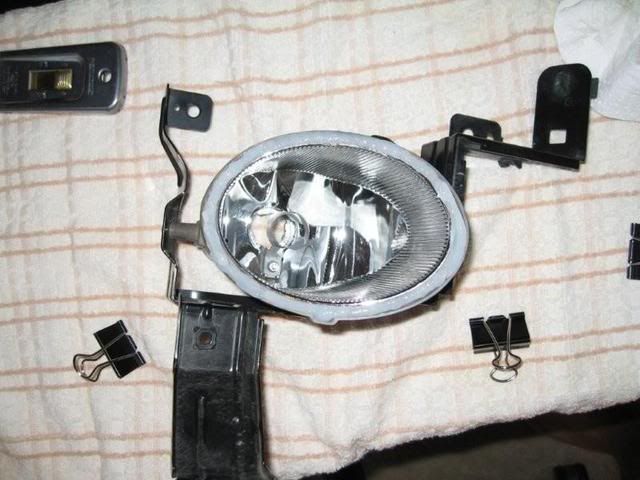
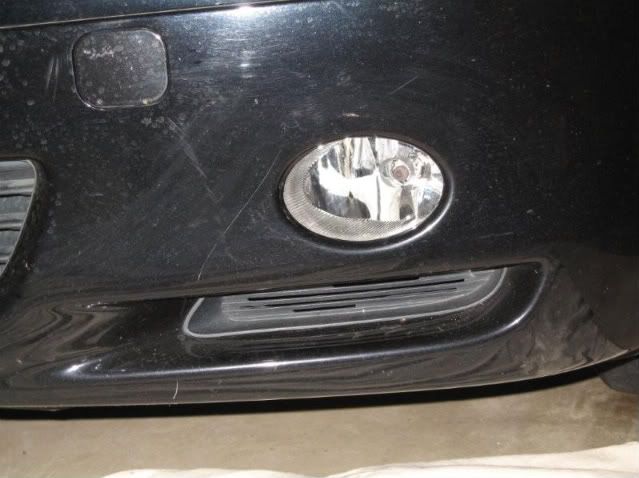
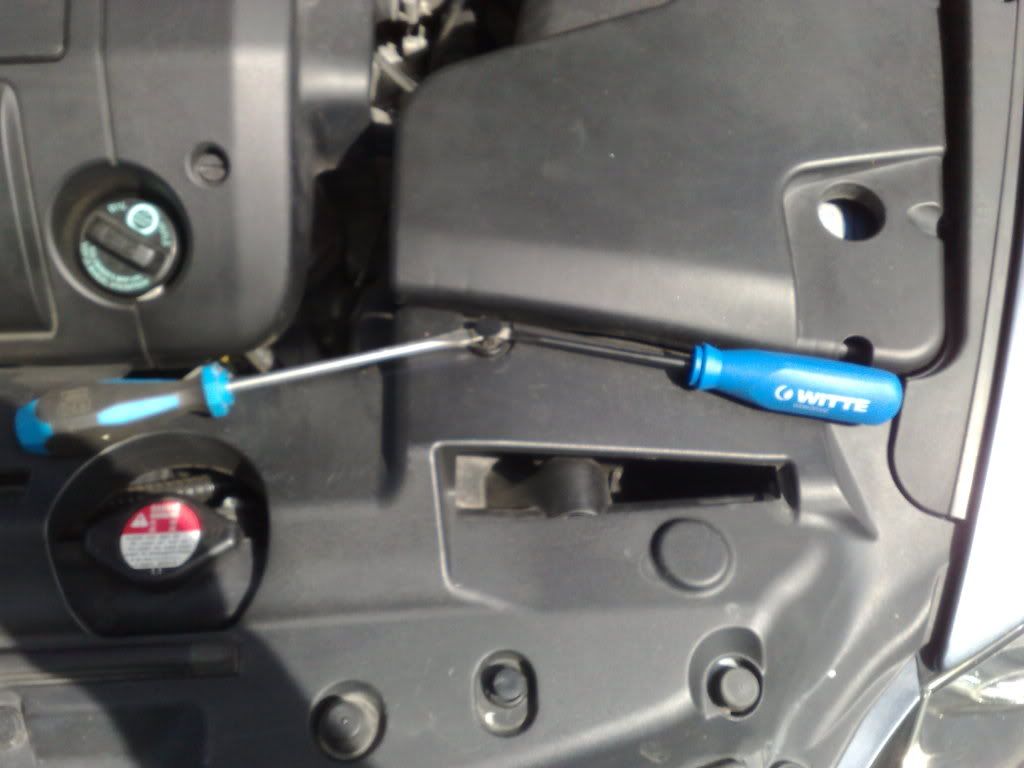
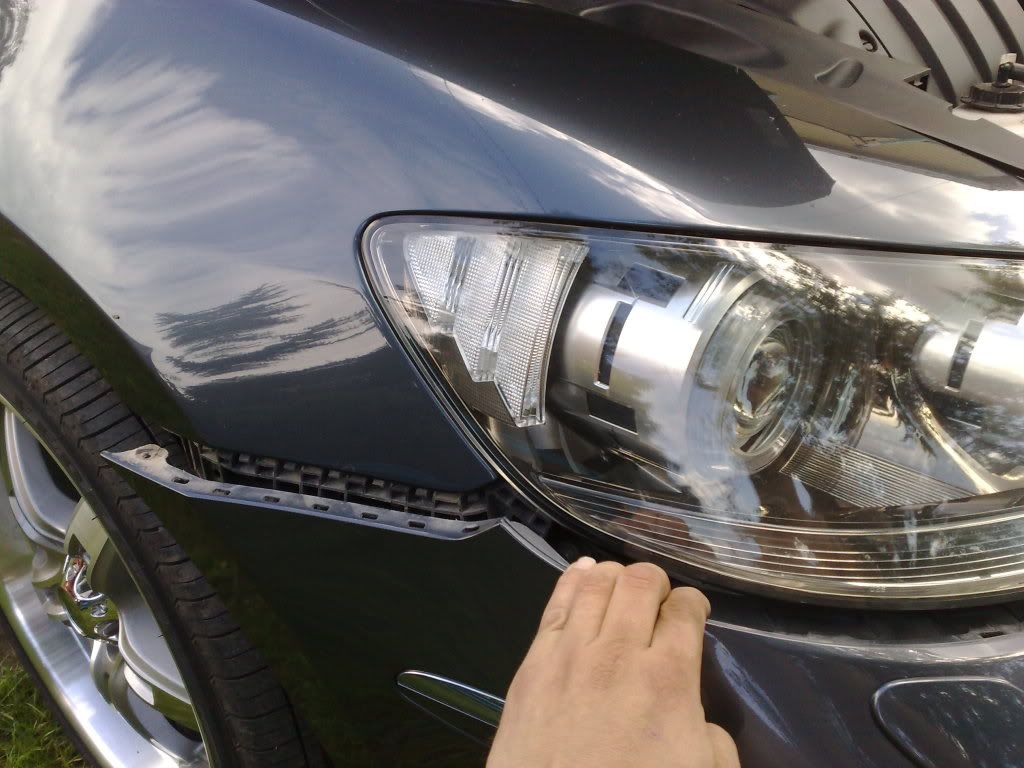
Here's what it looks like while it is attached to the bumper. It is held in place by 3 screws. 2 are located inside the bumper and 1 is attached from the outside which will require you to remove the chrome accent piece that is attached to the bumper.
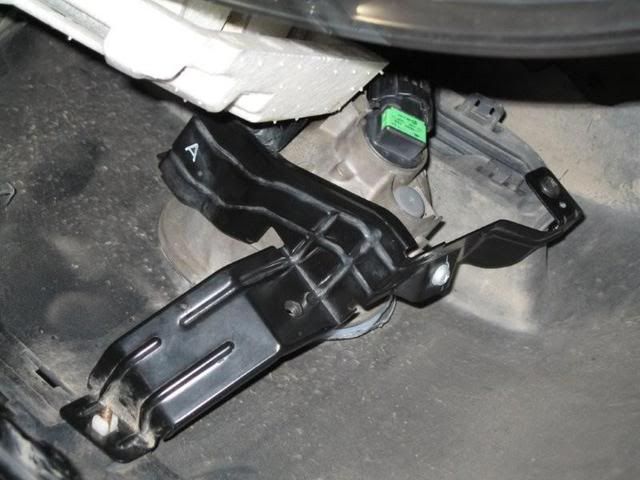
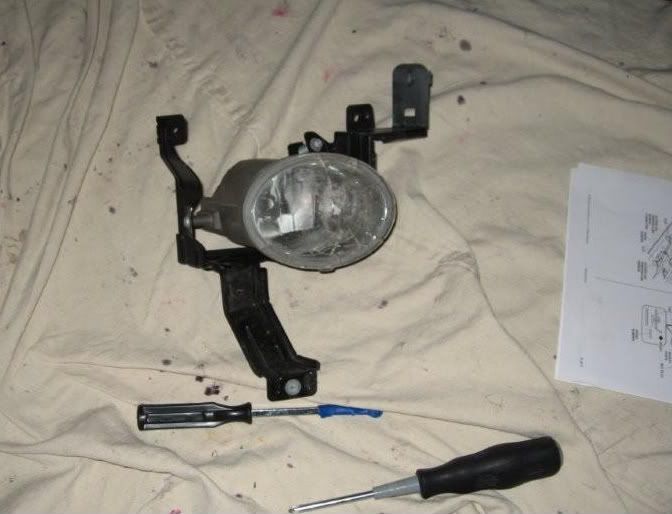
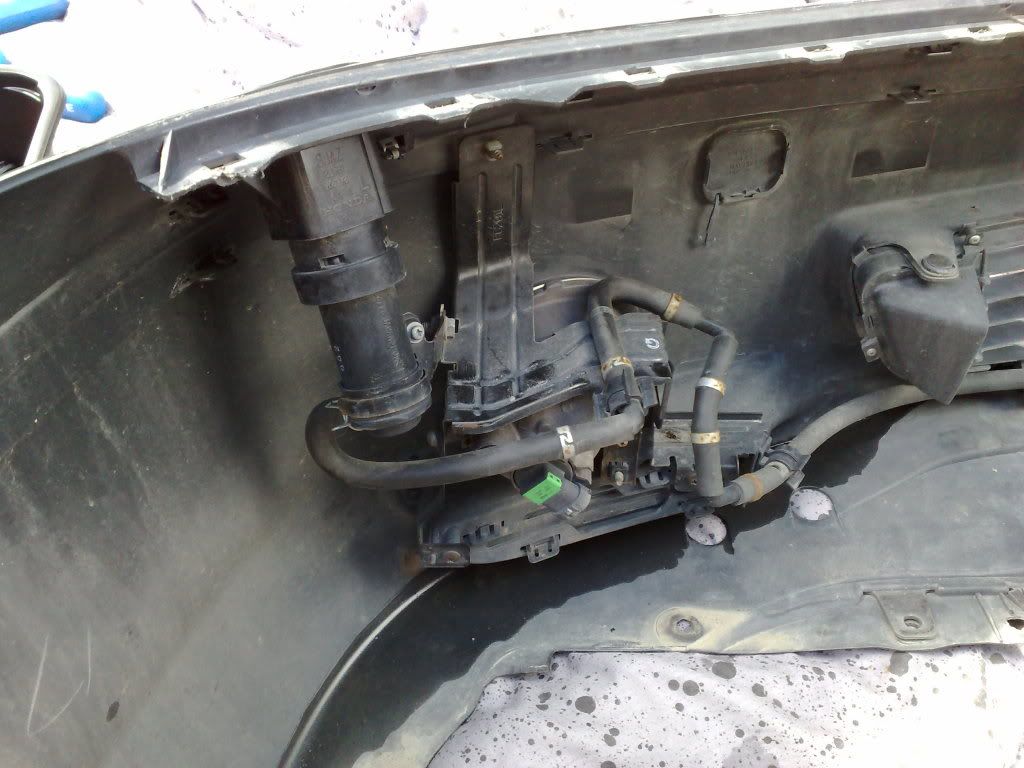
Here's a look after the foglight housing has been removed from inside the bumper.
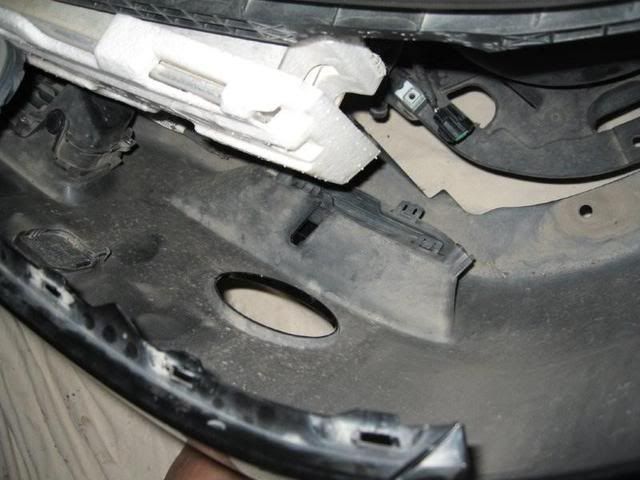
Here's a look after the foglight housing has been removed from the outside.
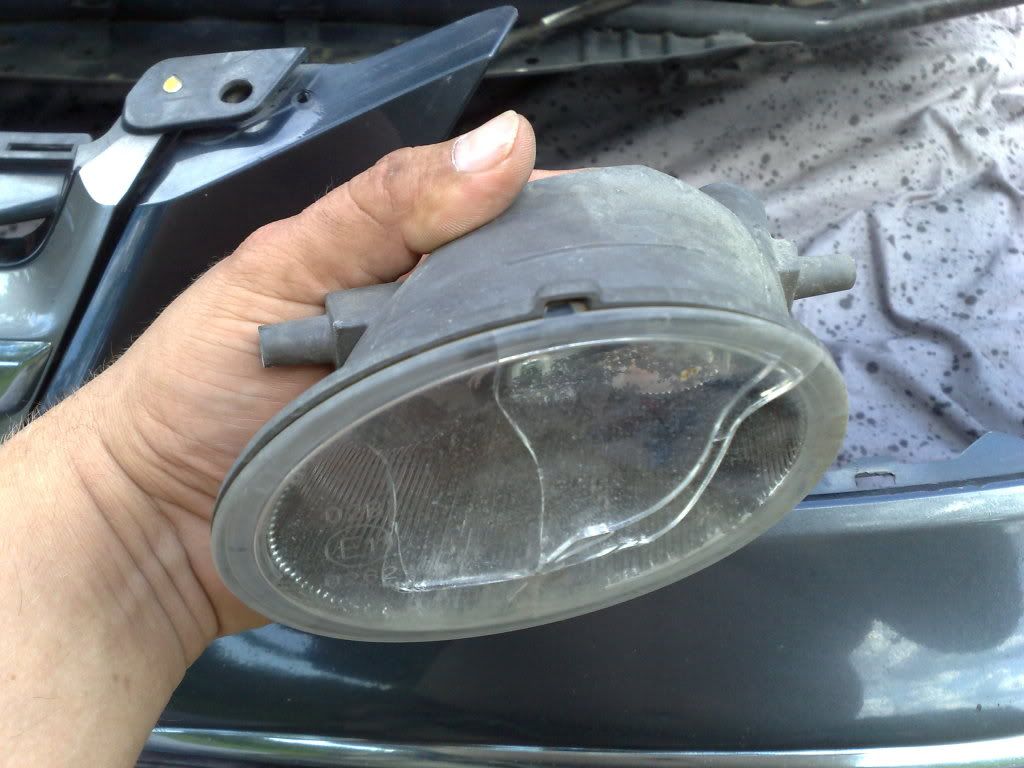
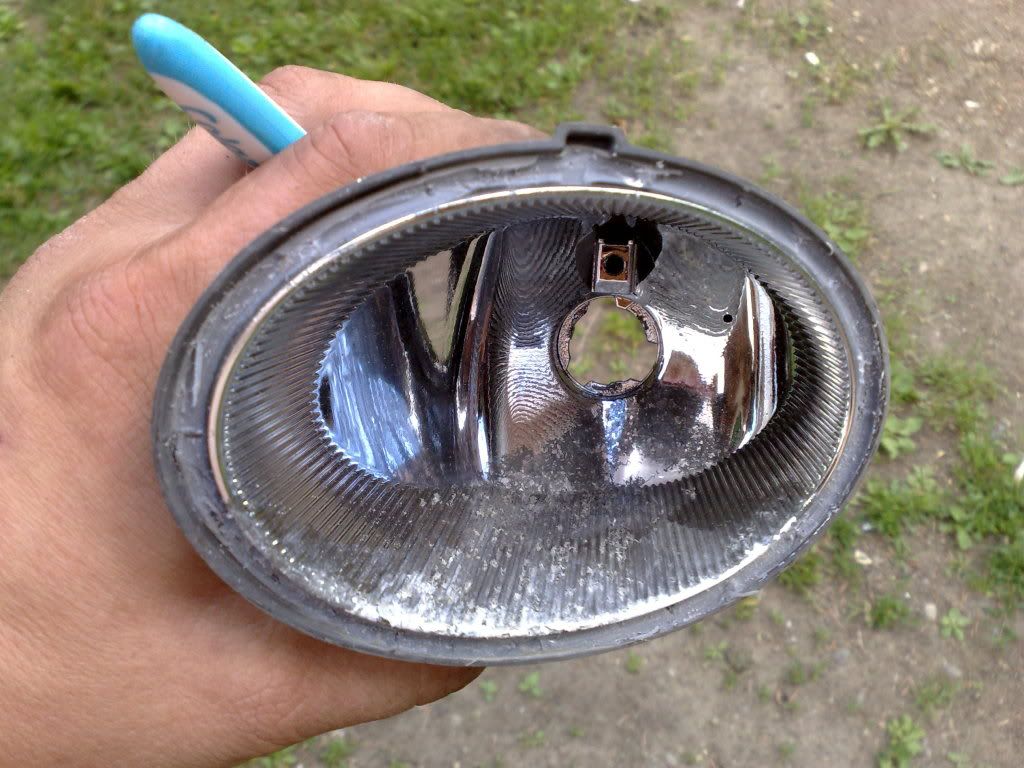
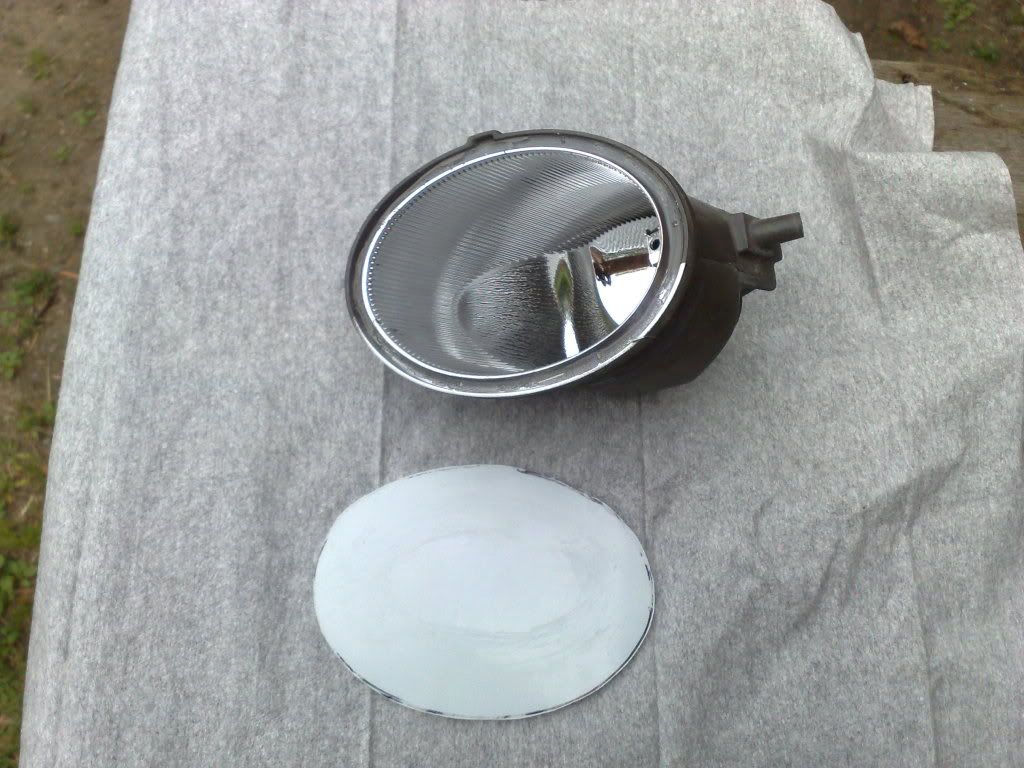
Here's the broken foglight lens and why we are reading this.
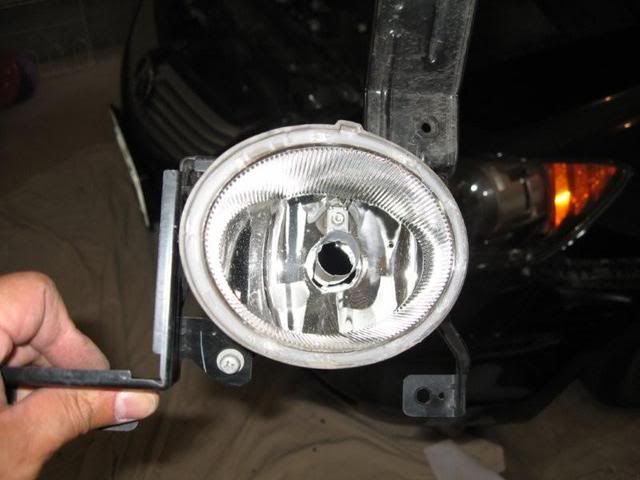
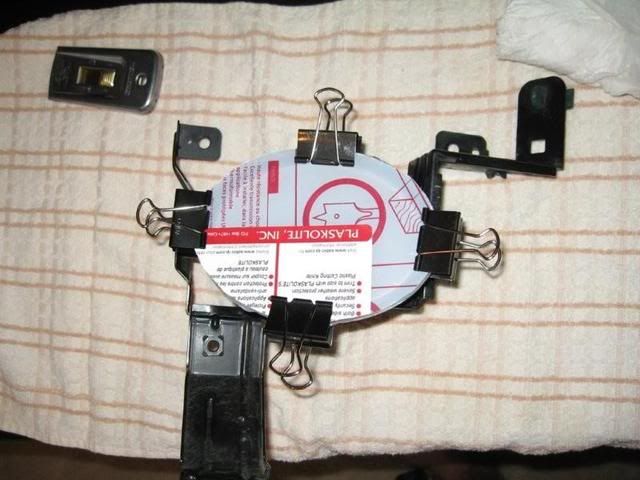
Here's what it looks like after I removed all the broken glass from the foglight housing. This was probably the toughest part b/c I did not want to cut myself. Just take your time with this b/c you don't want to damage the inside of the foglight housing.
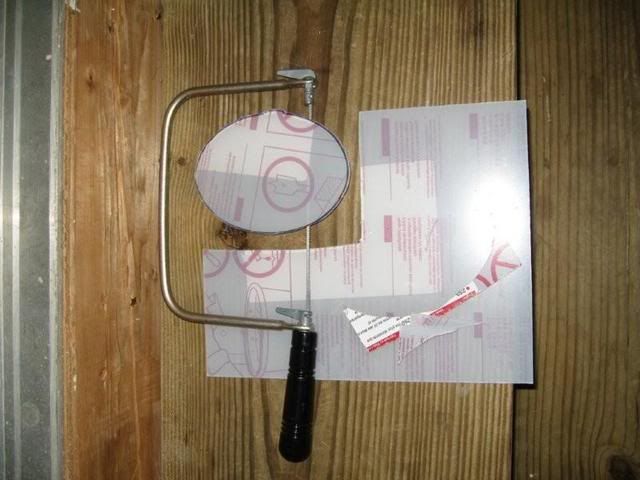
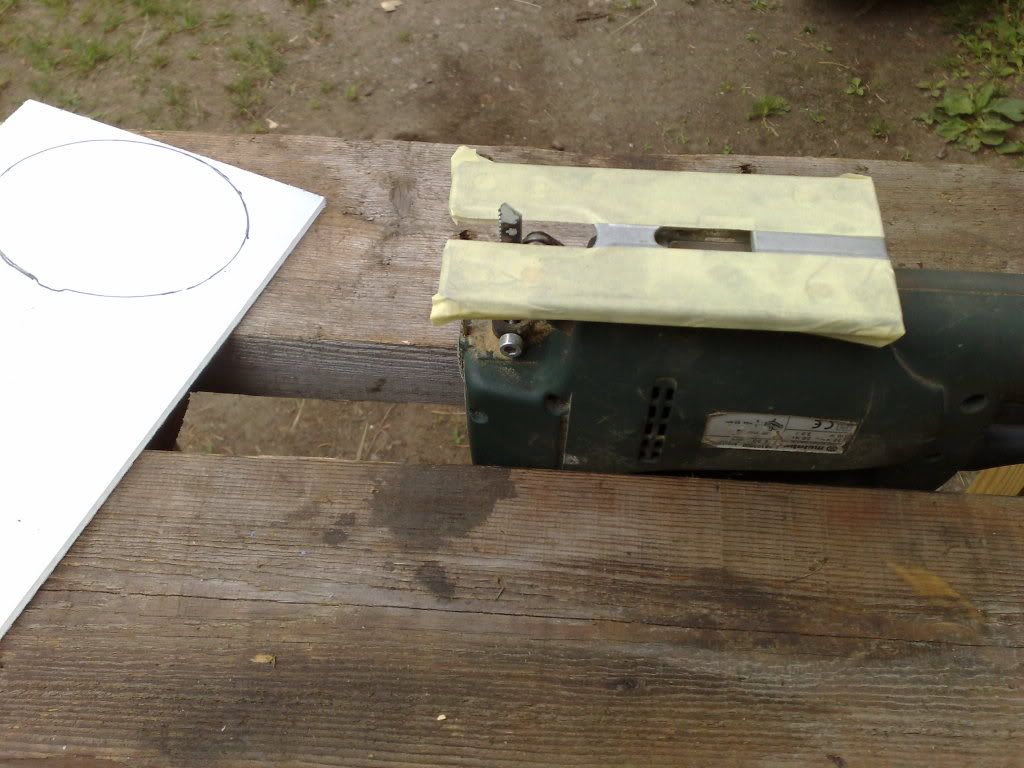
Next, take the foglight housing and place it on top of the Lexan glass and trace it. Then using a coping saw, I cut it out and used my Dremel tool to sand down the edges.
Next, squeeze a good amount of silicon on the outer edge of the foglight housing so that you can attach the Lexan to the foglight housing.
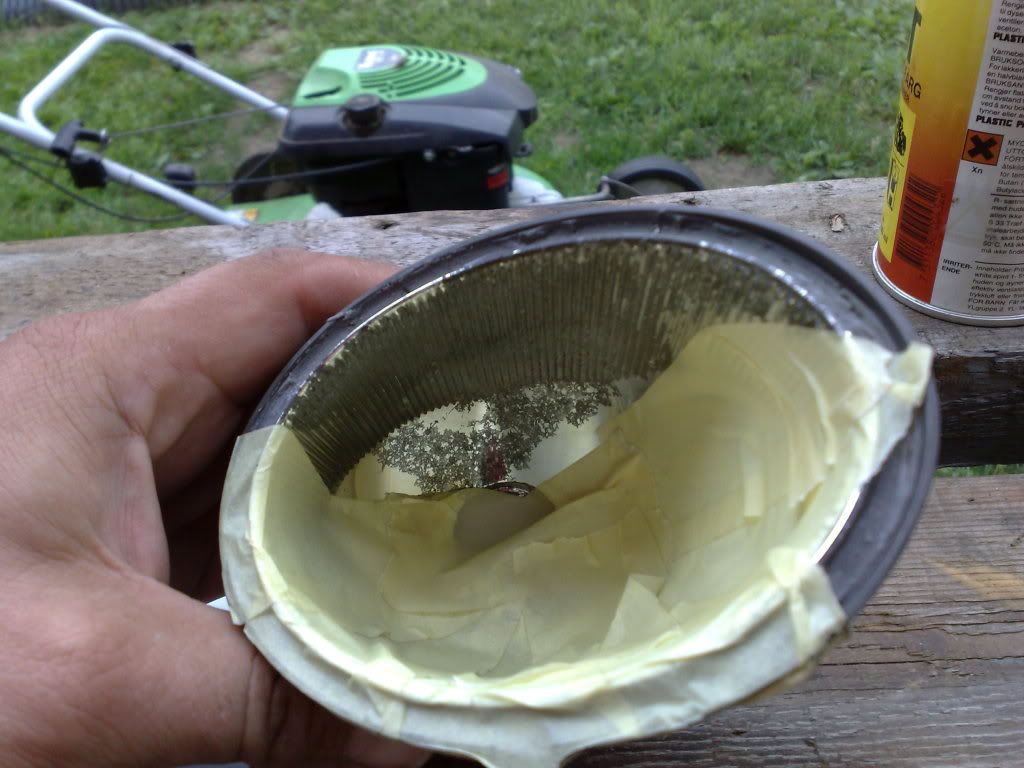
Then remove the inside protective film on the Lexan glass and place it on top of the foglight housing. I used some office clips to hold it in place while the silicon dries overnight. The silicon will harden in 3 hours but cures in 24 hours. I figured 12 hours would be a safe bet.
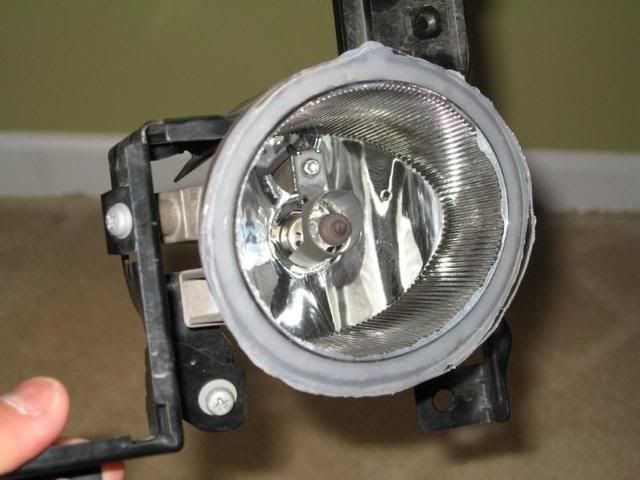
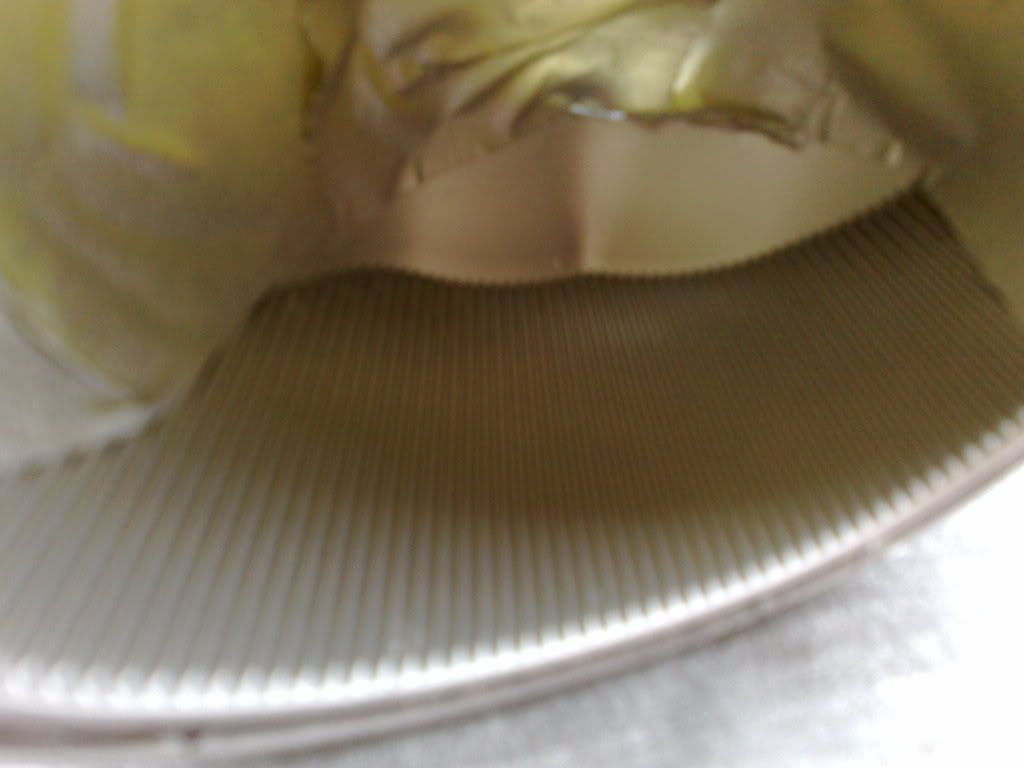
Next day, I remove the outer film on the Lexan glass and this is what it looks like after it has dried. Don't worry about the rough edges b/c the bumper will hide this.
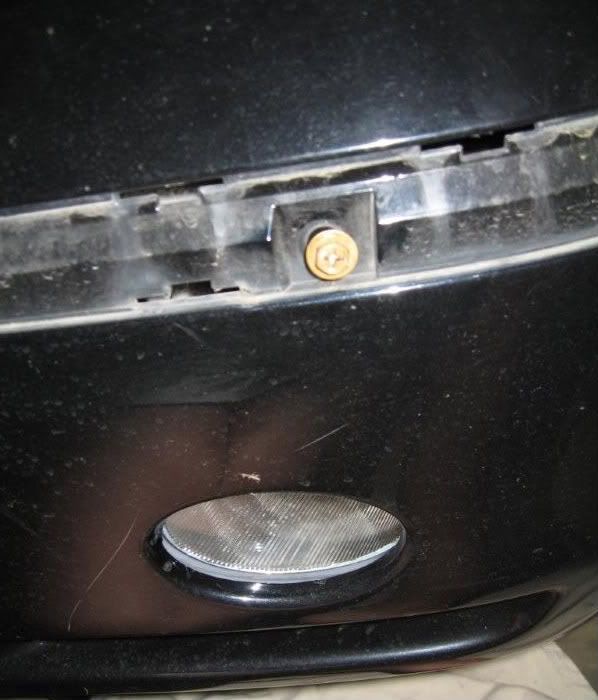
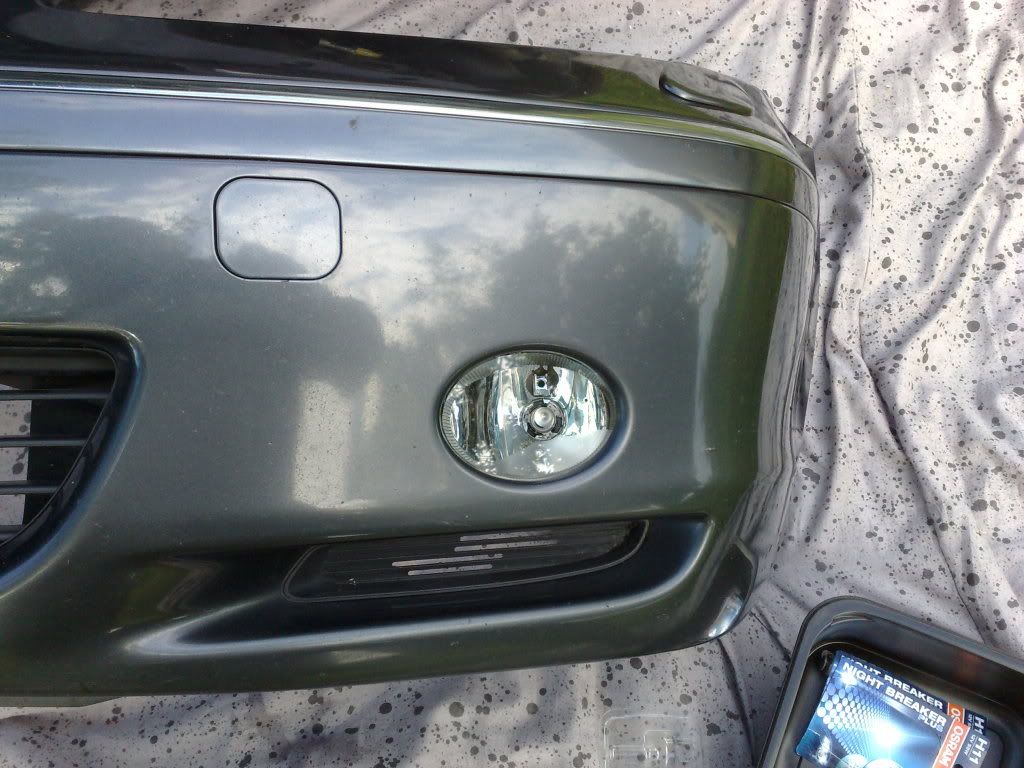
Here's a picture of the outer screw when I reattached the foglight that is located under the chrome accent piece on the bumper.
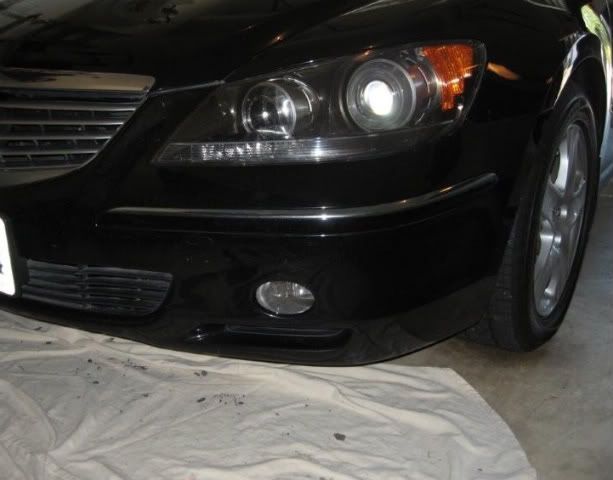
Here's the new glass lens in place, good as new!
Here's the finish product! Btw, I did not replace the other foglight lens. I figured if it breaks, it will be pretty easy to fix since I have already gone through this drill once.
I hope this helps a lot of people out there! Good Luck!!!!!!!
With the help of reading some other DIY foglight repairs on this Acura forum and from other Honda forums, here's my DIY foglight repair for under $10.00. It took about 2 hours of actually "work" time and about 12 hours of waiting for the silicon to dry.
Supplies:
1. Lexan Polycarbonate Glass (Found at Lowes for $3.80, 8x10)
2. Exterior Silicon (Found at any hardware store for $4.80)
3. Download this manual that will help you remove the front bumper so you can remove the foglight. http://techinfo.honda.com/rjanisis/pubs/AI/BII31139.pdf
Note: Lexan Polycarbonate glass is 250 times stronger than normal glass and is virtually unbreakable, plus it does not chip and can be exposed to high heat. It's used in spaceshuttle windows and for bulletproof windows. I figured if it can do all of this, it should be good enough for a foglight lens.
So here we go..........
You will first need to remove the engine covers that will reveal the bumper clips so that you can get the front bumper partially off. Follow the pdf link above and it will assist you with the bumper removal. I found this especially helpful to locate the nuts and clips to get the bumper off.
Next, once all clips and nuts are removed....you can get to the foglight housing off that is located behind the bumper.
Here's what it looks like while it is attached to the bumper. It is held in place by 3 screws. 2 are located inside the bumper and 1 is attached from the outside which will require you to remove the chrome accent piece that is attached to the bumper.
Here's a look after the foglight housing has been removed from inside the bumper.
Here's a look after the foglight housing has been removed from the outside.
Here's the broken foglight lens and why we are reading this.
Here's what it looks like after I removed all the broken glass from the foglight housing. This was probably the toughest part b/c I did not want to cut myself. Just take your time with this b/c you don't want to damage the inside of the foglight housing.
Next, take the foglight housing and place it on top of the Lexan glass and trace it. Then using a coping saw, I cut it out and used my Dremel tool to sand down the edges.
Next, squeeze a good amount of silicon on the outer edge of the foglight housing so that you can attach the Lexan to the foglight housing.
Then remove the inside protective film on the Lexan glass and place it on top of the foglight housing. I used some office clips to hold it in place while the silicon dries overnight. The silicon will harden in 3 hours but cures in 24 hours. I figured 12 hours would be a safe bet.
Next day, I remove the outer film on the Lexan glass and this is what it looks like after it has dried. Don't worry about the rough edges b/c the bumper will hide this.
Here's a picture of the outer screw when I reattached the foglight that is located under the chrome accent piece on the bumper.
Here's the new glass lens in place, good as new!
Here's the finish product! Btw, I did not replace the other foglight lens. I figured if it breaks, it will be pretty easy to fix since I have already gone through this drill once.
I hope this helps a lot of people out there! Good Luck!!!!!!!
 07-08-2010, 11:30 PM
#2
nice.
 07-09-2010, 09:41 AM
#6
Instructor
Thread Starter
Join Date: Nov 2006
Location: Northern Virginia
Age: 52
Posts: 172
Likes: 0
Received 4 Likes
on
2 Posts
I think posing this DIY was harder work than doing the foglight lens replacement. Like I said, I'm just spreading the "wealth" and if I can help anyone out there....it's all good! About a year ago, I couldn't find much out there on repairing the foglight.
07-09-2010, 09:45 AM
#7
Great work! I actually also created a DIY for this a few months ago
https://acurazine.com/forums/2g-rl-2005-2012-76/g-009-diy-rl-fog-light-glass-replacement-769528/
https://acurazine.com/forums/2g-rl-2005-2012-76/g-009-diy-rl-fog-light-glass-replacement-769528/
Trending Topics
07-09-2010, 10:02 AM
#8
Instructor
Thread Starter
Join Date: Nov 2006
Location: Northern Virginia
Age: 52
Posts: 172
Likes: 0
Received 4 Likes
on
2 Posts
Great work Jhal.....I used some of your ideas in my thread. I almost took your route of using glass but went with the Lexan when I saw some other person use that material on their Honda Civic foglight. I was worried about using glass b/c I would be back where I started if the glass cracks or breaks again.
07-09-2010, 10:56 AM
#9
As many know, a broken foglight lens on the 2nd Generation RL is pretty common and quite expensive to repair if you take it to your local Acura dealer or body shop. I found this out when bringing my car in for a state inspection and it failed b/c of the broken foglight. When they told me it would cost $400.00, I had to take matters into my own hand b/c there's no way I'm going to pay $400.00 to repair a broken piece of glass on a foglight.
I find it interesting that my dealer also told me that my cracked fog lens would have to be replaced in order for my car to pass inspection. Six months later when I went in for my inspection, it was a different service manager, and he told me that a cracked fog lens was NOT part of the inspection criteria. Therefore I didn't have it done. My lens has a perfect horizontal crack across the center. Almost looks like a glass defect vs an impact crack. Eventually I'll fix it myself.
This dealer has just extended their service hours to Sunday.
Also, they recently asked via email if I wanted them to do a check on all the recalls for my vehicle. They are getting desperate for work so consumer beware of unnecessary service they are trying to push on you.
07-09-2010, 11:13 PM
#10
Instructor
Thread Starter
Join Date: Nov 2006
Location: Northern Virginia
Age: 52
Posts: 172
Likes: 0
Received 4 Likes
on
2 Posts
I believe you when it comes to who the inspector is. I had the same broken foglight last year when I went in for an inspection and it passed with no questions asked. This year, not so lucky. In the end, it probably forced me to get this darn "eye sore" fixed.
12-14-2010, 02:17 PM
#11
4th Gear

Join Date: Dec 2010
Posts: 4
Likes: 0
Received 0 Likes
on
0 Posts
Thanks for the DIY as I have been driving with "one eye" for a couple of months. I will fix my foglight in the spring (Minnesota) and until then I cut four pieces of clear shipping tape the shape of the lense and placed them over the rock hole. This should keep out the moisture and dirt until it warms up enough to repair the lense.
 12-30-2010, 04:33 PM
#13
 07-13-2012, 06:17 PM
#14
Moderator
iTrader: (2)
Join Date: Apr 2012
Location: Buffalo Grove, IL
Age: 34
Posts: 2,676
Received 612 Likes
on
490 Posts
Thanks for the DIY!! I'm actually planning on doing this over the week-end. Seems to be one of the most common cosmetic issues with this car.
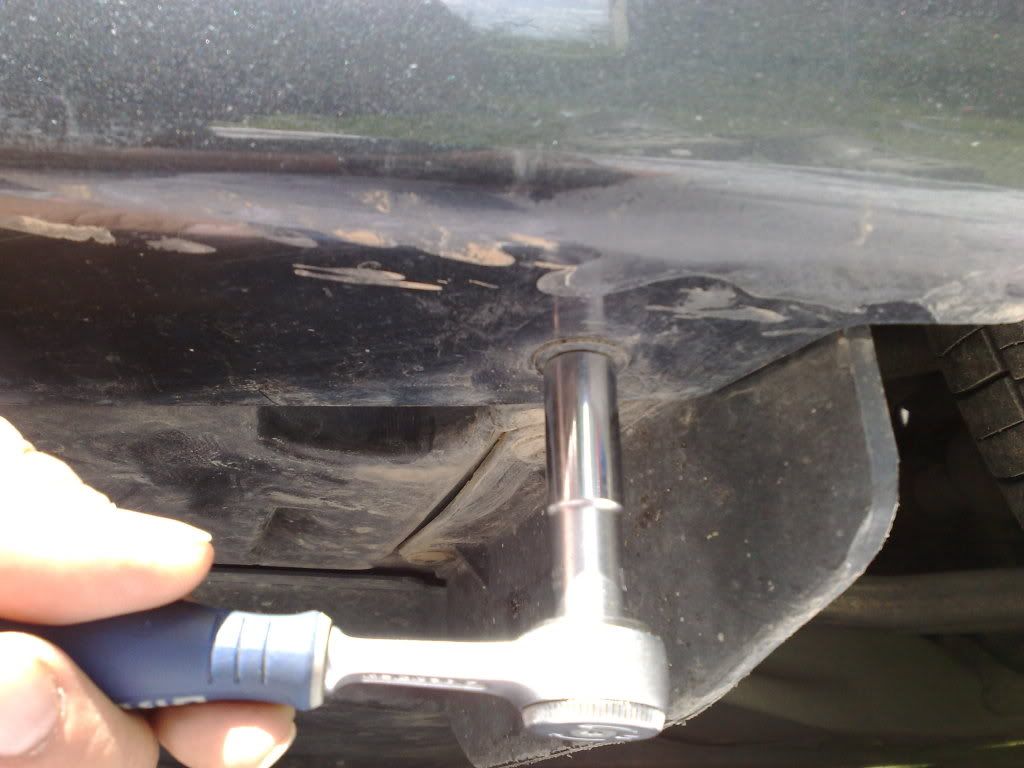
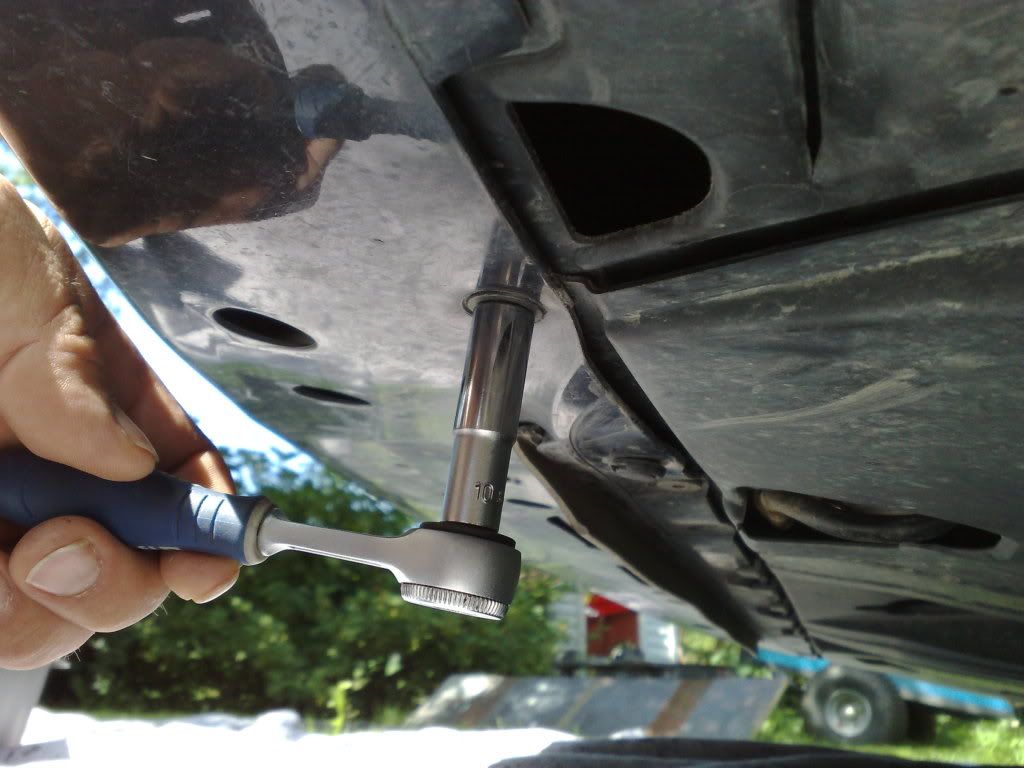
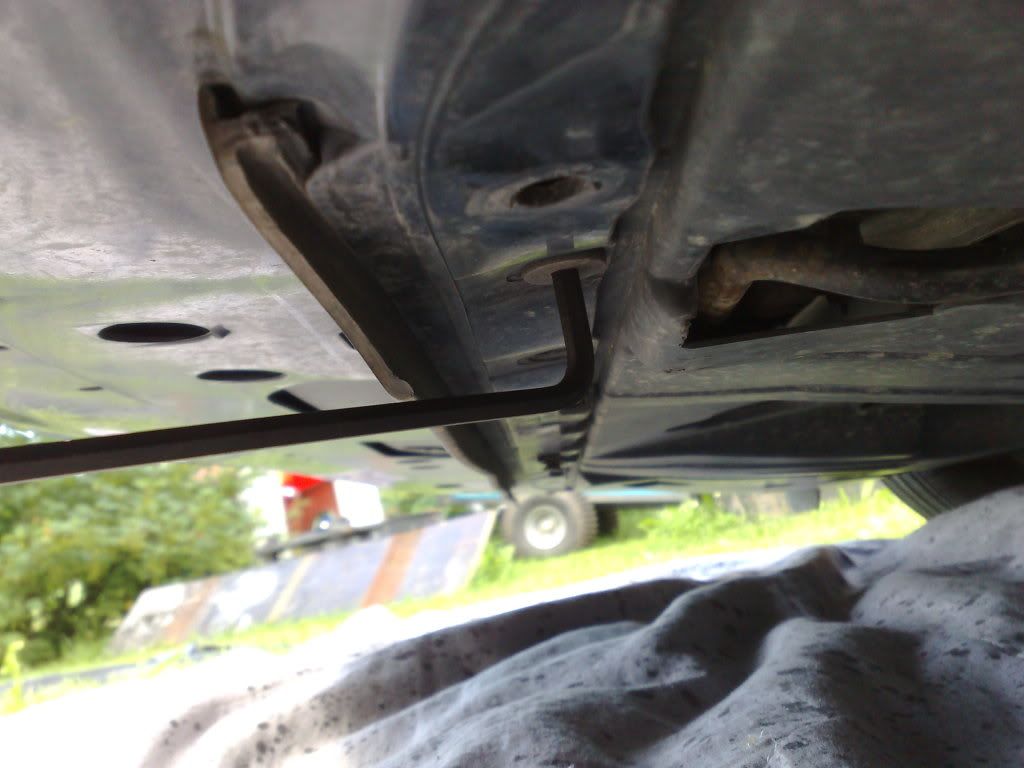
Just a quick question to the OP and anyone who has done this. The pictures make it seem like the 2 bolts that are inside the bumper are accesible from the bottom. It seems to me like I do not have to remove the bumper, and only need to remove the shield on the bottom of the car. Am I correct in this assumption?
Just a quick question to the OP and anyone who has done this. The pictures make it seem like the 2 bolts that are inside the bumper are accesible from the bottom. It seems to me like I do not have to remove the bumper, and only need to remove the shield on the bottom of the car. Am I correct in this assumption?
07-13-2012, 10:22 PM
#16
Senior Moderator
You may be able to get to the screws, but you won't be able to get the housing out of the bumper. Just take it off. It is pretty easy. I wrote up a step by step in a different thread and named it aptly. A search for "Front Bumper Removal" in the RL forum should dig it up.
The following users liked this post:
projektvertx (07-14-2012)
07-14-2012, 12:37 AM
#17
Moderator
iTrader: (2)
Join Date: Apr 2012
Location: Buffalo Grove, IL
Age: 34
Posts: 2,676
Received 612 Likes
on
490 Posts
You may be able to get to the screws, but you won't be able to get the housing out of the bumper. Just take it off. It is pretty easy. I wrote up a step by step in a different thread and named it aptly. A search for "Front Bumper Removal" in the RL forum should dig it up.
https://docs.google.com/file/d/0B9Kq...hl=en_US&pli=1
And the related discussion:
https://acurazine.com/forums/2g-rl-2005-2012-76/front-bumper-removal-pics-post-33-a-836814/
 07-14-2012, 12:37 PM
#19
Senior Moderator
The OP is long gone.
253, I'm pretty sure quite a few have used 3M film, but I don't know if that has saved any lenses. While the issue is relatively common here, I would suspect less than 5% of RLs experience a direct hit to the fog light.
253, I'm pretty sure quite a few have used 3M film, but I don't know if that has saved any lenses. While the issue is relatively common here, I would suspect less than 5% of RLs experience a direct hit to the fog light.
07-15-2012, 07:47 AM
#21
Racer
Had this done about a week ago.
I used 4mm thick Lexan (polycarbonate plastic) got it for free from one plastic company, they didnt want to take money because that 1 x 2 ft piece was in the trashes among with other relativly big pieces.
When i took the bumper off, i just took those three small screws out what keeps the foglight in the bracket, so no need to remove the whole assembly.
Noticed that there was some corrosion inside the light, water had done some damage, i brushed that lower part of the reflector clean with a toothbrush size brass brush and painted it with glossy silver paint (mask taped the good part of the reflector first)
Basically you cant see that the lower part of the reflector is painted, will see next summer if they notice missing e-markings of the new glass on the yearly inspection. Had it done like a month ago, only issue was that broken foglight glass.
Then i glued the plastic and waited it to dry.
It was clear that the bumper was taken of at some point of the cars life, some of the flathead 6mm screws was missing but now it was good time to replace them, i used some Yamaha or Honda bike flathead hex screws.
I think that hardest part was those foglight wires and headlight washer tubes, taking them of was easy but it was harder to get them back.
I took some photos of the whole thing but i think that everything is allredy covered very well by this DIY.
07-16-2012, 07:10 PM
#22
Moderator
iTrader: (2)
Join Date: Apr 2012
Location: Buffalo Grove, IL
Age: 34
Posts: 2,676
Received 612 Likes
on
490 Posts
^Free repairs are always good 
Just to follow up on my earlier post. This operation IS do-able without removing the entirety of the bumper. What I did was set the car up on jackstands and I removed the lower shield, from there, the passenger side foglight is very easy to remove. I have an '07 tech without ACC/CMBS, I suspect that's where Acura places that hardware, so it might be harder in ACC/CMBS models.
The driver side is a slightly different story. I spent most of my time there. The space is much harder to maneuver with, but the key thing to keep in mind is the bumper is polyurethane and does have some flexibility. Work with that. Also, my advice is to rotate the whole foglight assembly while going towards the outside of the car, as opposed to straight down, while pulling the driver foglight.
The polycarb lens can also be dremel cut to size. Aside from that I found this DIY highly helpful Just some before/after pics of the fogs:


Just to follow up on my earlier post. This operation IS do-able without removing the entirety of the bumper. What I did was set the car up on jackstands and I removed the lower shield, from there, the passenger side foglight is very easy to remove. I have an '07 tech without ACC/CMBS, I suspect that's where Acura places that hardware, so it might be harder in ACC/CMBS models.
The driver side is a slightly different story. I spent most of my time there. The space is much harder to maneuver with, but the key thing to keep in mind is the bumper is polyurethane and does have some flexibility. Work with that. Also, my advice is to rotate the whole foglight assembly while going towards the outside of the car, as opposed to straight down, while pulling the driver foglight.
The polycarb lens can also be dremel cut to size. Aside from that I found this DIY highly helpful
Just some before/after pics of the fogs:
The following users liked this post:
phamsk (03-08-2015)
07-17-2012, 08:53 AM
#23
Racer
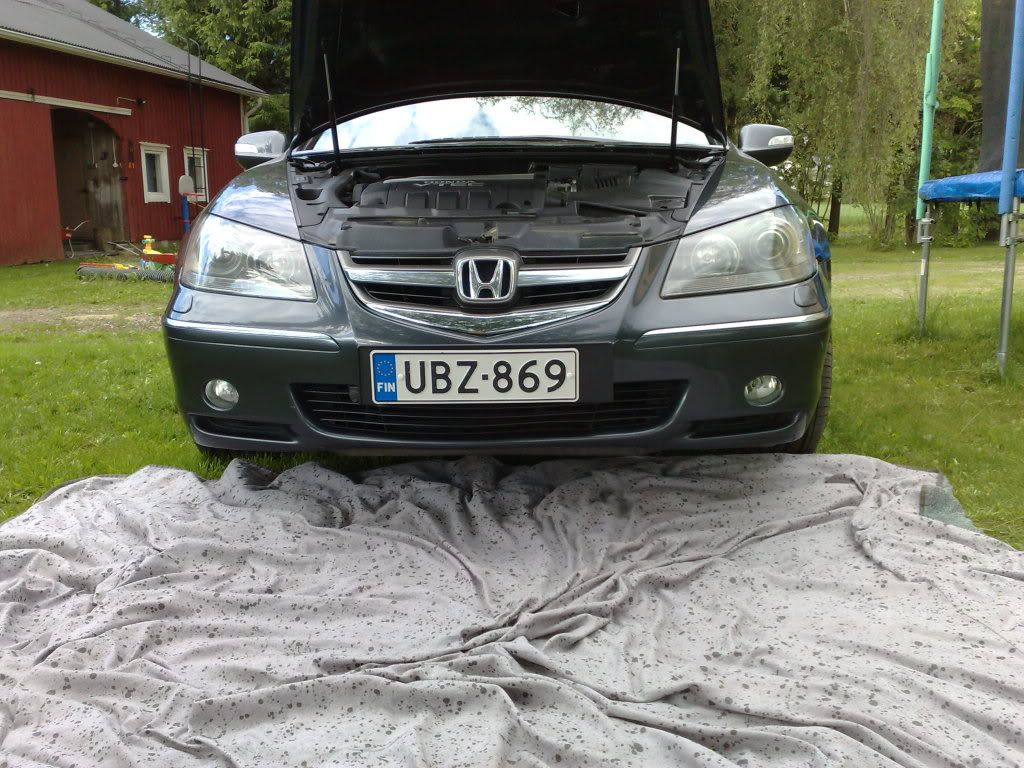
Photos are allways good for these kind a projects, so i will add some.
I made the job at my yard, just put the planket above the grass so that i dont loose any parts.
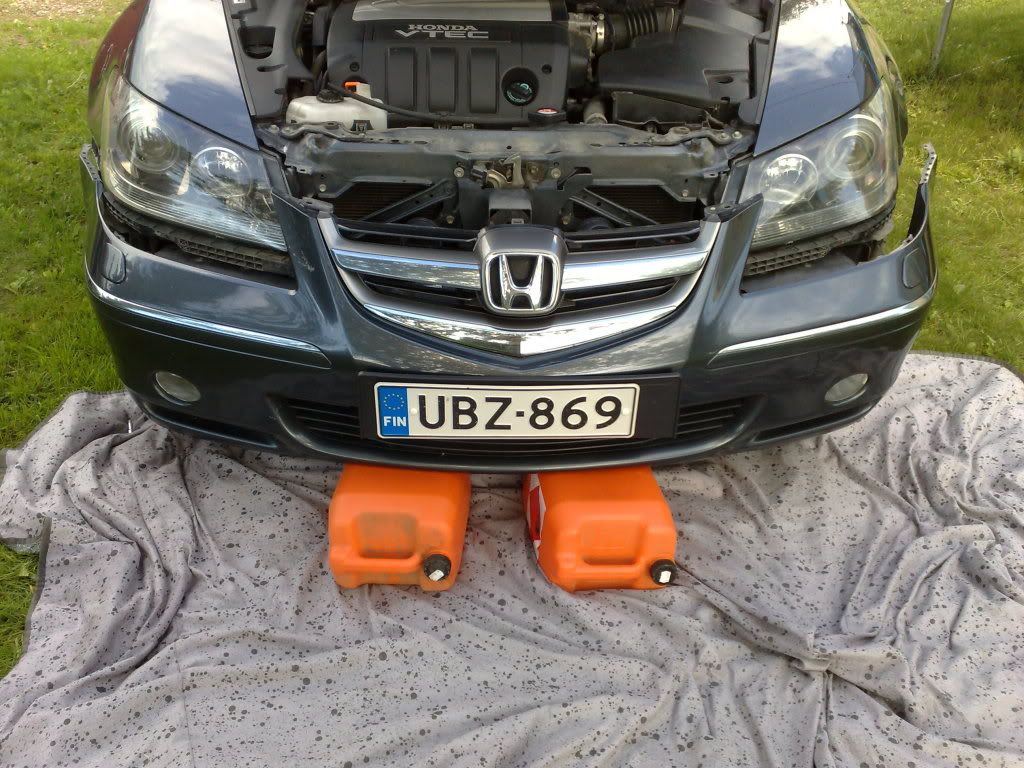
I did it alone so i used some empty plastic canisters to support the bumper.
Use two flathead screwdrivers to pry out those plastic fasteners.
Some screws located under the bumper.
There was missing some because bumper had been removed by some previous reasons, not by me.
Just use some amount force to pry sides of the bumper off those "hooks"
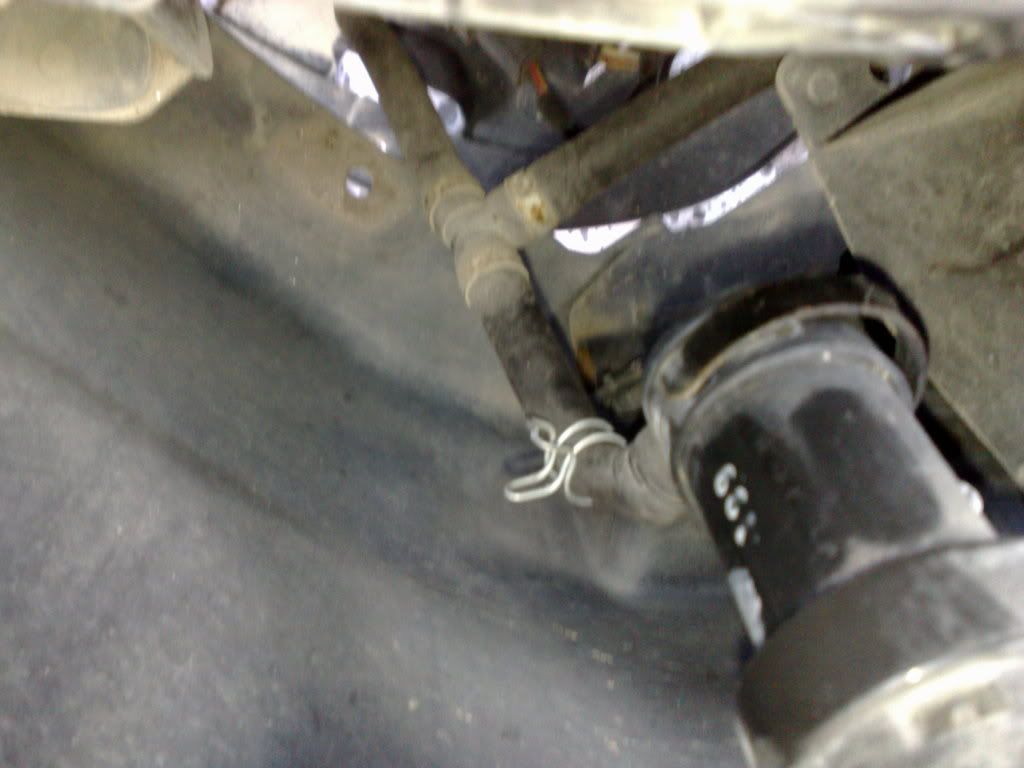
Had to take off that headlightwasher hose, prepare to plug it with something so that your reservoir doesnt go empty.
I took the light away from the fastener, only three small screws. Felt like easiest way to do it.
Had some corrosion on the lower part of the reflector, just brushed it clean with small brass brush. Then i taped the good part and painted with silver heat resistant paint, ok it is not like new but will do for now.
While the paint was drying i cut the lexan, used electric saw for it (it was properly secured to that "table")
I glued the lense and put some pressure on it while drying, then new bulbs and in it went.

Had some difficulties with lower part of the bumper to sit well in its place, there are those clips that are holding washerhose and that metal plate should go under them, resolved the problem by taking out that metal plate (attached with four M6 bolts)
And after that i installed the whole thing back.


Finished, will do for now.

I made the job at my yard, just put the planket above the grass so that i dont loose any parts.
I did it alone so i used some empty plastic canisters to support the bumper.
Use two flathead screwdrivers to pry out those plastic fasteners.
Some screws located under the bumper.
There was missing some because bumper had been removed by some previous reasons, not by me.
Just use some amount force to pry sides of the bumper off those "hooks"
Had to take off that headlightwasher hose, prepare to plug it with something so that your reservoir doesnt go empty.
I took the light away from the fastener, only three small screws. Felt like easiest way to do it.
Had some corrosion on the lower part of the reflector, just brushed it clean with small brass brush. Then i taped the good part and painted with silver heat resistant paint, ok it is not like new but will do for now.
While the paint was drying i cut the lexan, used electric saw for it (it was properly secured to that "table")
I glued the lense and put some pressure on it while drying, then new bulbs and in it went.
Had some difficulties with lower part of the bumper to sit well in its place, there are those clips that are holding washerhose and that metal plate should go under them, resolved the problem by taking out that metal plate (attached with four M6 bolts)
And after that i installed the whole thing back.
Finished, will do for now.
The following 3 users liked this post by Maintenanceman:
 09-29-2014, 09:22 AM
#25
I Drive Like A Dick 8≈
Since this thread has been bumped up anyways... is there any issue putting HID's into the fog light housing? It's a lot more heat and that's such a small housing, I don't want to start a fire or melt anything all to shit, but I really want to do a pair of 3000K HID's down in the fogs.
09-29-2014, 01:58 PM
#29
Senior Moderator
Carbon Legend has lots of experience with headlight bulbs. He claims HID are cooler than halogen as well as long as they are top tier manufacturers, OSRAM, Phillips, etc. Morimoto burn a little hotter than those, but still cooler than halogen. Shitty eBay bulbs can definitely melt a projector or reflector.
 10-07-2014, 04:18 PM
#31
2nd Gear

Join Date: Oct 2014
Location: Great Pacific Northwest
Posts: 2
Likes: 0
Received 0 Likes
on
0 Posts
Help Prevent Foglamp Lens Breakage
Have struggled with this issue for 5 Acuras over a 30 year period. Current is 2006 RL, purchased with a negotiated/replaced foglamp lens.
Current favorite protection is a film from Griot's Garage, used with a mist of positioning spray. Can be done without lamp/assembly removal.
Current favorite protection is a film from Griot's Garage, used with a mist of positioning spray. Can be done without lamp/assembly removal.
11-04-2014, 06:43 AM
#32
Intermediate
Really nice write up I'm going to try this later. Both of my fog lights are broken and had corrosion in them so there's really no chrome left in the fog lights.
03-03-2015, 07:47 AM
#33

These are fantastic instructions, i just fixed my passenger side fog using them w/o removing the bumpre or the bracket....just the foglight housing. A little cramped but it worked. Only issue i had was i put too much silicone and had to make a slight adjustment after setting the lexan into it, making a little silicone residue on the inside.
Also, you could have the lexan be about a half inch too big all the way around and it would still work/fit fine.
Also, you could have the lexan be about a half inch too big all the way around and it would still work/fit fine.
 08-19-2019, 09:07 AM
#35
2nd Gear

Thanks guys, this post gave me the confidence to do this myself. The bumper was a pain but not as bad as expected. I was pleasantly surprised that after 13 years in Chicago the bolts turned and were reusable.


Thread
Thread Starter
Forum
Replies
Last Post
quanaman
4G TL (2009-2014)
7
01-09-2023 07:33 PM